
Designing a kimono pattern that mirrors your personal style and creativity is an exciting journey. This guide will walk you through the essential steps and techniques, covering everything from finding inspiration to executing your unique design.
Understanding Kimono Styles
Before diving into design, it's important to explore the various traditional and modern kimono styles. Each style has its own unique characteristics, and understanding these can help you create a pattern that resonates with your desired aesthetic.
Choosing the Right Fabric
The fabric you select plays a crucial role in the overall comfort and drape of your kimono. Here we will discuss different fabric types:
- Cotton - Ideal for casual wear, breathable and easy to care for.
- Silk - Luxurious and elegant, perfect for formal occasions.
Color and Print Choices
The colors and prints you choose can greatly impact your design. Consider how different colors can complement your style and the message you want to convey.
Pattern Inspiration Sources
Inspiration can come from various sources such as nature, art, and cultural motifs. Incorporating these elements into your design can make your kimono truly unique.
Sketching Your Design
Sketching is a vital step in pattern-making. Start by translating your ideas onto paper. Essential tools for sketching include:
- Pencils
- Sketch paper
- Digital design software
Drafting the Pattern
Accurate measurements are crucial for a well-fitting kimono. Follow these steps to draft your pattern:
- Measure your body accurately.
- Construct the various pieces, including sleeves and body.
Assembling Your Kimono
Once drafted, it's time to assemble your kimono. Explore essential sewing techniques, including seam types and finishing methods to achieve a polished look.
Conclusion: Personalizing Your Kimono
Creating your own kimono pattern is a rewarding experience that allows for personal expression. Remember to experiment and enjoy the process of designing a piece that is uniquely yours.
Understanding Kimono Styles
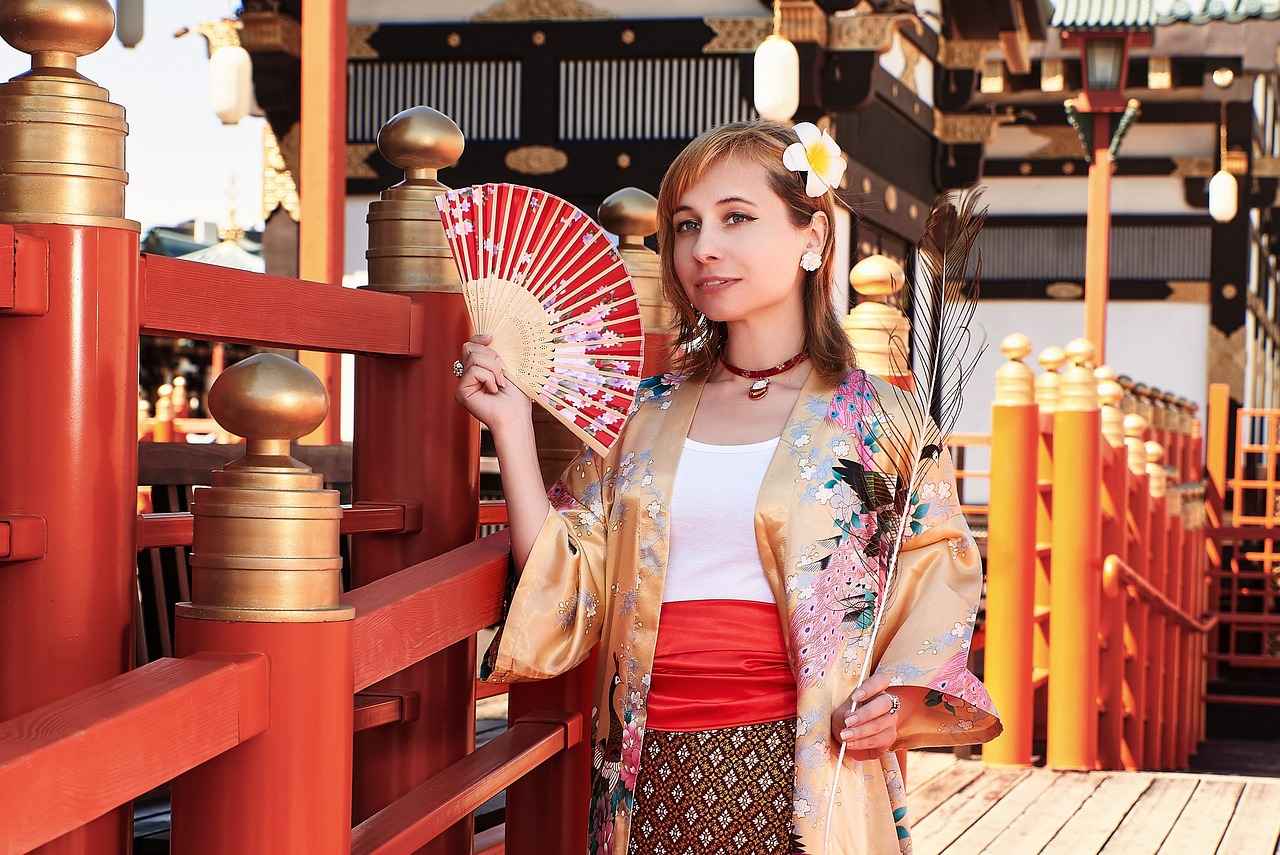
Kimono styles are a beautiful reflection of Japanese culture, showcasing both traditional artistry and modern interpretations. To create a kimono pattern that resonates with your desired aesthetic, it is essential to explore and understand the various styles available. This knowledge not only enhances your design but also honors the rich history behind each style.
Traditional Kimono Styles
- Furisode: Known for its long sleeves, the Furisode is often worn by young women during special occasions such as weddings and coming-of-age ceremonies.
- Yukata: A casual summer kimono made from cotton, the Yukata is lightweight and often adorned with vibrant patterns, perfect for festivals.
- Tomesode: This formal kimono is characterized by its short sleeves and is typically worn by married women at formal events.
- Hōmongi: A semi-formal kimono that features patterns that flow across seams, making it suitable for various occasions.
Modern Kimono Styles
- Kimono Jackets: These are shorter and can be worn over Western clothing, blending traditional elements with contemporary fashion.
- Street Style Kimonos: Often characterized by bold colors and prints, these kimonos are popular among younger generations and are frequently seen in urban fashion.
- Designer Kimonos: High-fashion interpretations of the kimono often incorporate luxurious fabrics and innovative designs, appealing to a global audience.
Understanding these styles is crucial for creating a pattern that resonates with the aesthetic you wish to achieve. Whether you aim for a traditional look or a modern twist, your choice of style will significantly influence your design process. Taking inspiration from these styles can help you craft a unique kimono that reflects your personal taste while honoring the cultural significance of this timeless garment.
Choosing the Right Fabric
is a crucial step in creating your kimono, as it significantly affects the garment's comfort and drape. The right fabric not only enhances the overall aesthetic but also contributes to the functionality and wearability of the kimono. In this section, we will explore various fabric types, their unique properties, and how to select the most suitable options for your kimono patterns.
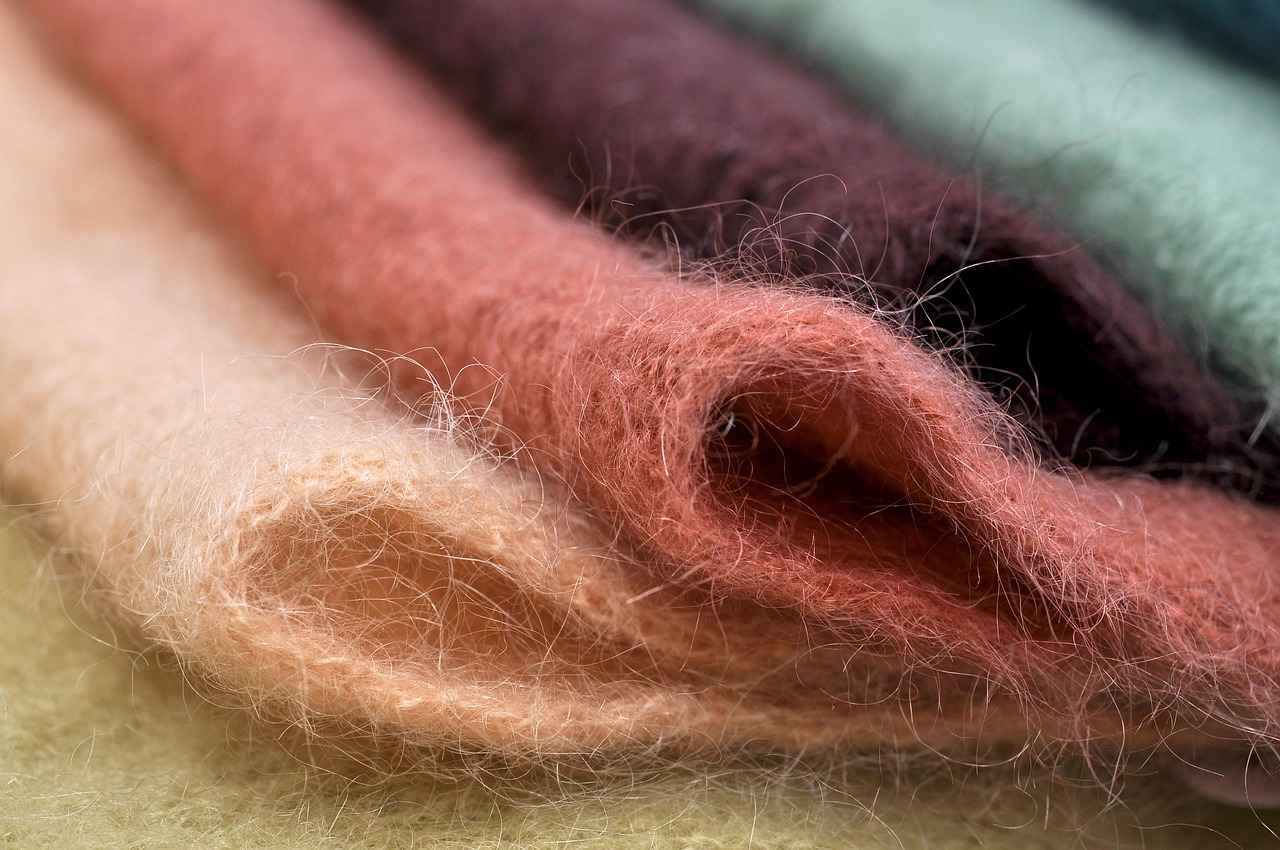
When it comes to fabrics, two of the most popular choices for kimono-making are cotton and silk. Each fabric has its own set of characteristics that can influence your design:
- Cotton: Known for its durability and breathability, cotton is an excellent choice for casual kimonos. It’s easy to care for and comes in a wide variety of prints and colors, making it versatile for everyday wear.
- Silk: Renowned for its luxurious feel and elegant drape, silk is ideal for formal occasions. It has a natural sheen that enhances the visual appeal of intricate patterns but requires more delicate care.
In addition to cotton and silk, there are other fabrics to consider:
- Linen: Perfect for summer kimonos, linen is lightweight and breathable, although it wrinkles easily.
- Polyester: A durable and affordable option, polyester can mimic the look of silk while being easier to maintain.
When selecting fabric, consider the season and the occasion for which the kimono is intended. For instance, lightweight fabrics are ideal for warmer months, while heavier materials work well in cooler weather. Additionally, think about how the fabric will hold the pattern you choose; some fabrics may enhance bold designs, while others may require subtler patterns to shine.
In conclusion, the fabric you choose will not only affect the kimono's appearance but also its comfort and functionality. By understanding the properties of different fabrics, you can make informed decisions that align with your personal style and the intended use of your kimono.
Cotton vs. Silk
Cotton and silk are two of the most popular fabrics used in kimono design, each offering a distinct set of properties and benefits. Understanding these differences is crucial for selecting the right material for your project.
Cotton is known for its breathability and durability. This fabric is ideal for casual kimonos and everyday wear. Its ability to absorb moisture makes it comfortable in warmer climates, and it is relatively easy to care for, often being machine washable. Cotton kimonos can be adorned with vibrant prints and patterns, making them a favorite for those who appreciate bold designs. Additionally, cotton is less expensive than silk, making it a practical choice for beginners or those on a budget.
On the other hand, silk exudes a sense of luxury and elegance. Its natural sheen and soft texture provide a beautiful drape that enhances the overall silhouette of the kimono. Silk is often chosen for formal occasions due to its refined appearance. However, it requires more careful handling and maintenance, as it is typically dry clean only. Silk kimonos can feature exquisite embroidery and delicate patterns, making them stand out in any wardrobe.
When deciding between cotton and silk for your kimono design, consider the occasion and desired aesthetic. For everyday wear, cotton is a practical choice, while silk is perfect for special events or when you want to make a statement. Ultimately, the choice of fabric can significantly influence the comfort, appearance, and overall experience of wearing your kimono.
| Property | Cotton | Silk |
|---|---|---|
| Breathability | High | Moderate |
| Durability | High | Moderate |
| Care | Machine washable | Dry clean only |
| Cost | Affordable | Expensive |
| Occasion | Casual | Formal |
Durability and Care
When it comes to creating a kimono that stands the test of time, understanding the durability of different fabrics is essential. Each fabric type has its unique properties, which influence not only the look and feel of your kimono but also its longevity. Here, we will explore various fabrics commonly used in kimono making and provide care tips to ensure your garment remains beautiful for years.
| Fabric Type | Durability | Care Instructions |
|---|---|---|
| Cotton | Highly durable, resistant to wear and tear. | Machine wash on gentle cycle; tumble dry low. |
| Silk | Delicate, less durable than cotton but luxurious. | Hand wash in cold water; avoid wringing; hang to dry. |
| Polyester | Very durable, resistant to shrinking and stretching. | Machine wash; can withstand higher temperatures. |
| Linen | Strong and durable but wrinkles easily. | Machine wash; iron on medium heat to remove wrinkles. |
To ensure your kimono lasts, proper care is just as important as the choice of fabric. Here are some tips:
- Store Properly: Hang your kimono to prevent creasing, or fold it neatly if space is limited.
- Avoid Direct Sunlight: Prolonged exposure can fade colors and weaken fibers.
- Regular Cleaning: Follow the specific care instructions for your fabric to maintain its integrity.
- Repair Promptly: Address any tears or damages immediately to prevent further deterioration.
By understanding the durability of your chosen fabrics and adhering to proper care techniques, you can ensure that your kimono remains a cherished piece in your wardrobe for many years. Remember, a well-cared-for kimono not only looks beautiful but also tells a story of craftsmanship and dedication.
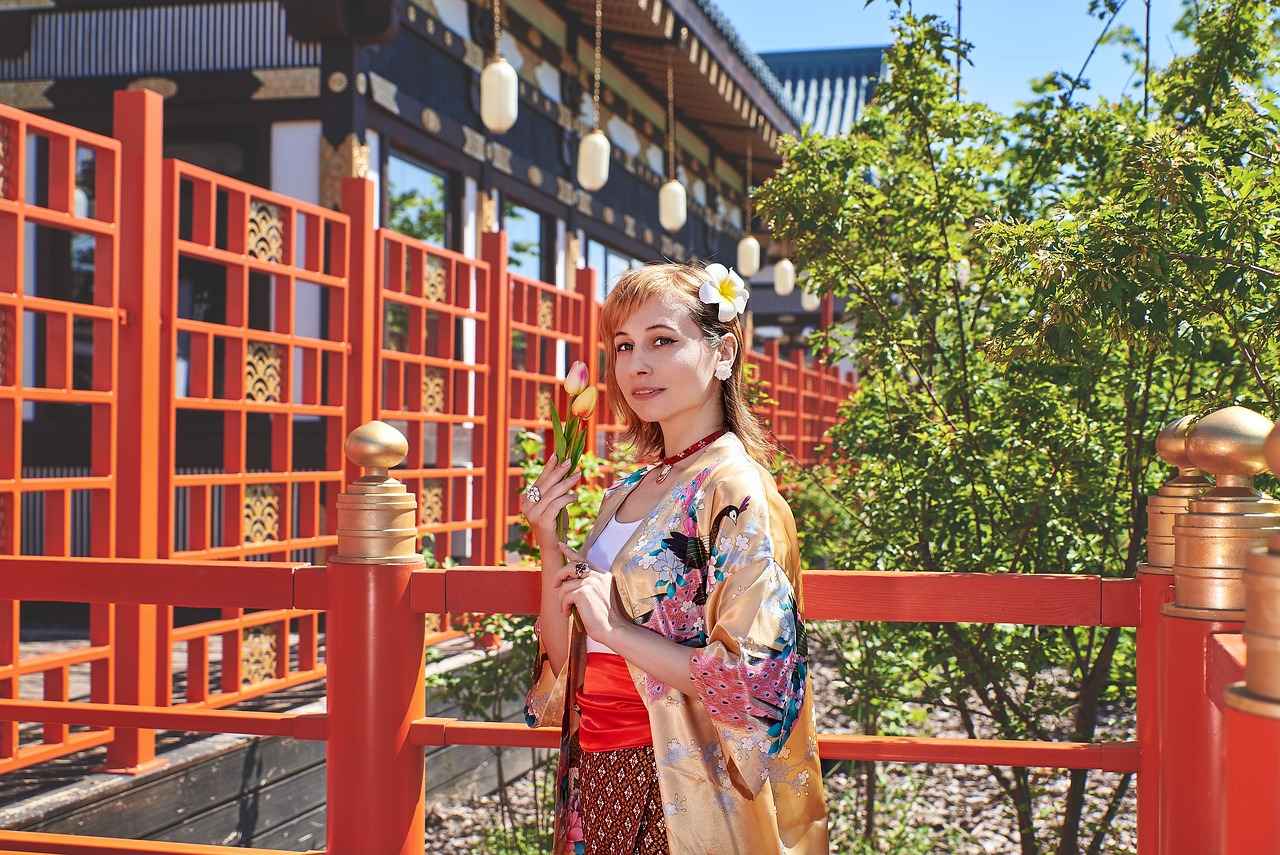
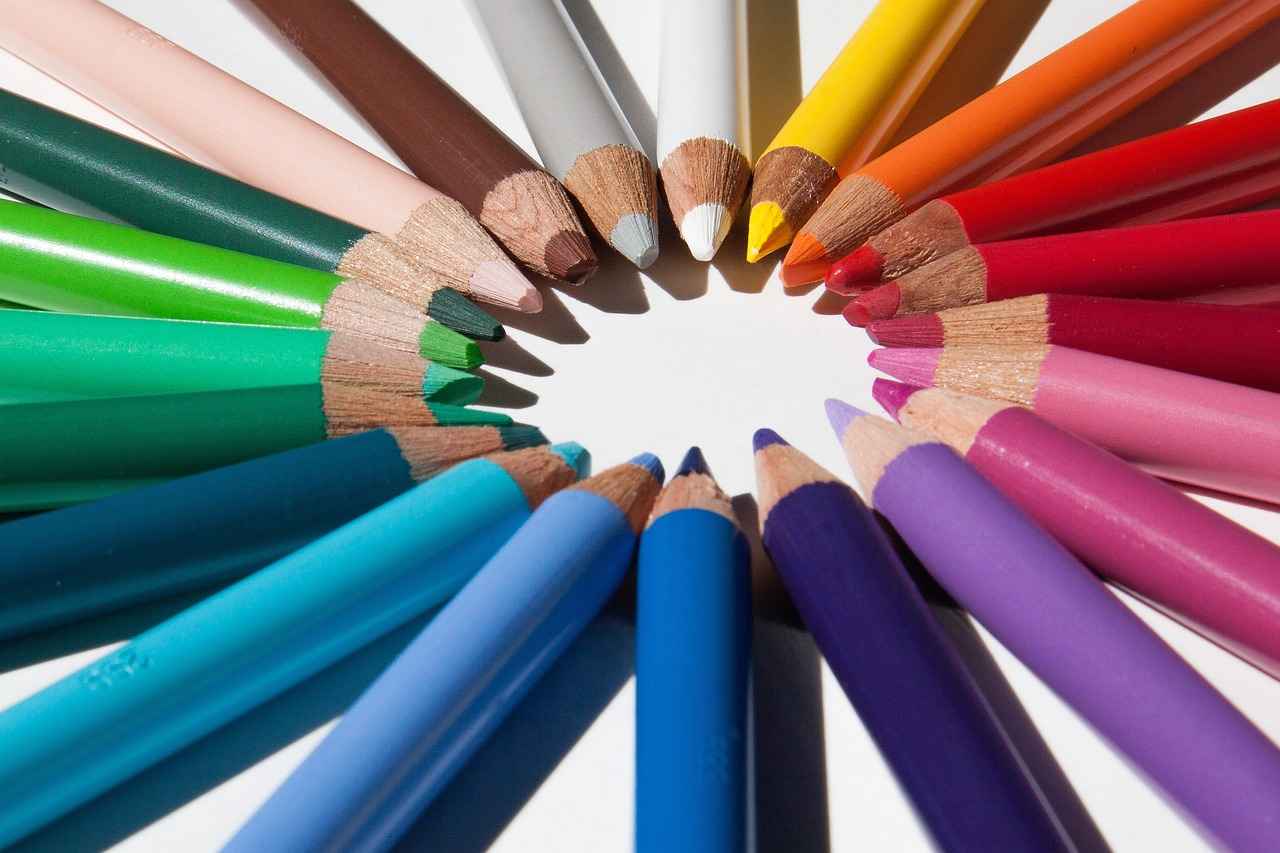
Color and Print Choices
The impact of color and print on kimono design is profound, influencing not only the aesthetic appeal but also the emotional resonance of the garment. When embarking on your kimono design journey, it is essential to understand how to select colors that not only complement your personal style but also enhance the overall composition of your design.
First and foremost, consider the psychology of color. Different colors evoke different feelings and associations. For instance, red often symbolizes luck and happiness in Japanese culture, while blue can convey calmness and serenity. Choosing a color palette that aligns with the message you wish to convey can significantly enhance your kimono's impact.
Next, think about the prints you wish to incorporate. Traditional kimono patterns, such as asanoha (hemp leaf) or seigaiha (blue ocean waves), carry cultural significance and can add depth to your design. Alternatively, modern prints can give your kimono a contemporary twist. When selecting prints, ensure they harmonize with your chosen colors to create a cohesive look.
One effective method for choosing colors and prints is to create a mood board. Gather fabric swatches, color samples, and images that inspire you. This visual representation will help you see how different elements work together and can guide your decision-making process.
Additionally, consider the season and occasion for which you are designing your kimono. Lighter, pastel colors may be more suitable for spring and summer, while deeper, richer tones can be perfect for fall and winter. By aligning your choices with seasonal trends, you can ensure your kimono remains relevant and stylish.
In conclusion, the choices you make regarding color and print are pivotal in defining your kimono's character. By understanding the emotional implications of colors, respecting traditional patterns, and considering seasonal appropriateness, you can create a kimono that not only reflects your personal style but also resonates with those who see it.
Pattern Inspiration Sources
When it comes to designing your own kimono pattern, finding the right sources of inspiration is crucial. The beauty of a kimono lies not only in its fabric but also in the patterns that adorn it. Here are some diverse inspirations you can draw from:
- Nature: The natural world offers a plethora of patterns and colors. Consider elements like flowers, leaves, and landscapes. For example, cherry blossoms symbolize beauty and the fleeting nature of life, making them a popular choice for kimono designs.
- Art Movements: Different art movements can provide unique inspiration. From the fluid lines of Art Nouveau to the bold colors of Pop Art, each style can influence your pattern in distinct ways.
- Traditional Patterns: Explore traditional Japanese patterns such as Asanoha (hemp leaf) or Seigaiha (waves). These motifs carry cultural significance and can add depth to your design.
- Textiles and Fabrics: Look at the textures and weaves of various fabrics. The way light interacts with different materials can inspire the overall look of your pattern.
- Personal Experiences: Draw from your own life experiences and memories. Perhaps a trip to a beautiful garden or a memorable sunset can inspire a color palette or pattern.
Incorporating these elements into your kimono design can create a unique and meaningful piece. Start by sketching ideas based on these inspirations, and don’t hesitate to mix elements from different sources to create something truly original.
Remember, the key to a successful kimono pattern is not just in the visuals but also in the story it tells. Let your creativity flow and enjoy the process of bringing your vision to life!
Sketching Your Design
Sketching is a crucial step in the pattern-making process, serving as the foundation for your kimono design. This section will guide you through effective techniques to translate your creative ideas onto paper, ensuring that your vision is both clear and practical.
To start, it's essential to understand that sketching is not just about drawing; it's about visualizing your concepts. Here are some tips to enhance your sketching process:
- Begin with Basic Shapes: Start by outlining the fundamental shapes of your kimono. Use simple geometric forms to represent the body, sleeves, and collar.
- Focus on Proportions: Ensure that the proportions of your sketch reflect the desired fit and style. This will help you visualize how the fabric will drape and flow.
- Incorporate Details: Once you have the basic structure, add details such as patterns, textures, and embellishments. This is where your creativity can shine.
- Use Reference Images: Gather images of existing kimonos for inspiration. This can help you understand various styles and how they are constructed.
- Practice Consistently: Like any skill, sketching improves with practice. Dedicate time to sketch regularly, experimenting with different styles and techniques.
Additionally, consider using digital tools for sketching. Software applications can provide flexibility, allowing you to easily make adjustments and experiment with colors and patterns without the need for erasing or redrawing.
In conclusion, effective sketching is the bridge between your imagination and the actual pattern. By following these tips, you can create a comprehensive sketch that serves as a reliable guide during the drafting process, ultimately leading to a beautifully designed kimono that reflects your unique style.
Tools for Sketching
When embarking on the journey of creating your own kimono pattern, having the right tools at your disposal is crucial. This section outlines the essential tools you’ll need for sketching your kimono pattern, ensuring that your creative process is both enjoyable and effective.
- Pencils: A good set of pencils is fundamental for sketching. Consider using a range of pencils with different hardness levels, such as 2B for darker lines and HB for lighter sketches. This variety allows for greater flexibility in your drawings.
- Paper: The type of paper you choose can significantly impact your sketching experience. Look for smooth, high-quality drawing paper that can handle erasing and layering. Sketchbooks or loose sheets in sizes like A4 or A3 are popular choices.
- Erasers: A good eraser is essential for refining your sketches. Consider both a rubber eraser for larger areas and a kneaded eraser for more delicate corrections.
- Ruler and French Curves: Precision is key in pattern-making. A ruler will help you draw straight lines, while French curves are perfect for creating smooth, curved lines that mimic the natural shapes of kimono designs.
- Software Options: In today's digital age, using design software can enhance your sketching process. Programs like Adobe Illustrator or CorelDRAW allow for intricate designs and easy modifications. For those looking for free alternatives, Inkscape or SketchBook can be excellent choices.
By equipping yourself with these essential tools, you’ll be well-prepared to translate your ideas into beautiful kimono patterns. Remember, the right tools not only enhance your creativity but also make the sketching process more enjoyable and productive.
Creating a Digital Design
is an essential step in the modern kimono-making process. With the advancement of technology, using digital tools can significantly enhance your design experience, making it more efficient and creative.
Digital design software allows you to visualize your kimono pattern in a way that traditional methods cannot. Here are some key benefits of utilizing these tools:
- Precision: Digital tools provide precise measurements and adjustments, ensuring that every aspect of your design is accurate.
- Flexibility: You can easily make alterations to your design without starting from scratch, allowing for experimentation with various styles and elements.
- Intricate Designs: Digital platforms enable you to create complex patterns that may be difficult to achieve by hand.
To get started, consider the following steps:
- Select Software: Choose a digital design software that suits your needs. Popular options include Adobe Illustrator, CorelDRAW, and free alternatives like Inkscape.
- Create a Base Template: Begin by designing a base template for your kimono. This template will serve as the foundation for adding patterns and colors.
- Experiment with Patterns: Use the software's tools to experiment with different textures, colors, and patterns. You can layer designs to see how they interact with each other.
- Save and Export: Once satisfied with your design, save your work and export it in the necessary format for printing or further editing.
Incorporating digital tools into your kimono pattern-making process not only enhances your creativity but also streamlines the workflow. As you become more familiar with these tools, you will find that your designs can evolve in ways you previously thought impossible.
Conclusion: Embracing digital design is a game-changer for kimono makers. It opens up a world of possibilities, allowing for greater creativity and efficiency in your crafting journey. By harnessing the power of technology, you can create unique and intricate kimono patterns that reflect your personal style.
Drafting the Pattern
is a critical step in the creation of your kimono. This process requires careful attention to detail and precision in measurements to ensure that your final garment fits perfectly and showcases your unique style. Below, we will explore the essential steps involved in drafting an accurate kimono pattern.
First and foremost, accurate measurements are the foundation of a successful kimono pattern. It is essential to take your measurements correctly to achieve a well-fitting design. Start by measuring your bust, waist, and hip circumference, as well as the length of your desired kimono. Additionally, measure the width of your shoulders and the length of your sleeves. These measurements will guide the proportions of your pattern.
| Measurement | Description |
|---|---|
| Bust | Measure around the fullest part of your bust. |
| Waist | Measure around your natural waistline. |
| Hip | Measure around the fullest part of your hips. |
| Sleeve Length | Measure from the shoulder to the desired sleeve length. |
Once you have gathered your measurements, the next step is to construct the pattern pieces. This includes drafting the main body, sleeves, and collar of the kimono. Use your measurements to determine the dimensions of each piece. It is advisable to create a muslin prototype first to test the fit before cutting into your final fabric.
In addition, consider the seam allowances when drafting your pattern. Typically, a seam allowance of 1/4 to 1/2 inch is standard, but this can vary based on your sewing technique. Make sure to mark these allowances clearly on your pattern pieces to avoid confusion during the sewing process.
Finally, remember that drafting a kimono pattern is not just about measurements; it’s also about creativity. Feel free to experiment with different shapes and styles as you draft your pattern, allowing your personal flair to shine through. With patience and practice, you will create a beautifully drafted kimono pattern that is uniquely yours.
Measuring Yourself
is an essential step in creating a well-fitting kimono. Accurate measurements ensure that your garment not only looks great but also feels comfortable. This section provides a step-by-step guide to measuring yourself effectively, which will help you draft a precise pattern for your kimono.
- Gather Your Tools: You will need a flexible measuring tape, a notepad, and a pen to record your measurements.
- Wear Fitted Clothing: To get the most accurate measurements, wear fitted clothing or measure over your undergarments.
Step 1: Measure Your Bust
Wrap the measuring tape around the fullest part of your bust, ensuring it is parallel to the floor. Take note of the measurement, and make sure the tape is snug but not tight.
Step 2: Measure Your Waist
Find the natural waistline, which is typically located above your belly button and below your rib cage. Wrap the measuring tape around this area, again ensuring it is snug but not constricting.
Step 3: Measure Your Hips
Stand with your feet together and measure around the fullest part of your hips. Ensure the tape is level and not twisted.
Step 4: Measure Your Sleeve Length
With your arm relaxed and slightly bent, measure from the shoulder seam down to the wrist. This measurement is crucial for the kimono's sleeves to ensure they fit comfortably.
Step 5: Measure Your Back Width
To determine the back width, measure from one shoulder seam to the other across your back. This measurement helps in ensuring the kimono fits well across the shoulders.
Step 6: Record Your Measurements
Write down each measurement clearly for reference during the pattern drafting process. Double-check your measurements for accuracy.
By following these steps, you will have the necessary measurements to create a kimono pattern that fits you perfectly. Remember, taking accurate measurements is the foundation of a successful sewing project!
Constructing the Pattern Pieces
When it comes to creating your own kimono, the process of is crucial. Each component, from the sleeves to the body and collar, must be thoughtfully designed to ensure they fit together seamlessly. Here’s how to approach this important step in your kimono-making journey.
- Sleeves: The sleeves of a kimono can vary significantly in shape and size. Begin by deciding on the style of sleeve you want—traditional, wide, or modern. Measure the length and width according to your design, and remember to include ease for comfort.
- Body: The body of the kimono is the main section and should be drafted carefully. Use your measurements to create a front and back piece. Consider the silhouette you desire, whether it’s straight or more fitted, and adjust your pattern accordingly.
- Collar: The collar adds a distinctive touch to your kimono. Typically, it is a separate piece that requires precise measurement. Decide on the width and style of the collar—traditional or contemporary—and draft it to ensure it complements the overall design.
As you draft each piece, it’s essential to maintain accurate measurements and proportions. Use a pattern paper or digital tools to sketch out your designs clearly. Don’t forget to add seam allowances to each piece to account for sewing.
Once all the pieces are drafted, it’s helpful to lay them out together to visualize how they will fit. This step allows you to make any necessary adjustments before cutting your fabric. Ensuring that all parts fit together seamlessly will lead to a beautiful, well-constructed kimono that reflects your unique style.
In conclusion, constructing the pattern pieces is a fundamental part of creating your kimono. Take your time, be precise, and enjoy the process of bringing your design to life.
Assembling Your Kimono
Once you have successfully drafted your pattern, the next exciting phase is to assemble your kimono. This part of the process is crucial as it transforms your ideas into a tangible garment. Below, we delve into essential sewing techniques and tips that will help you achieve a polished finish for your kimono.
Sewing Techniques
To begin with, mastering a few key sewing techniques is vital. Here are some techniques to consider:
- Seam Types: Familiarize yourself with various seam types such as French seams for a clean finish, or flat-felled seams for added durability.
- Pressing: Regularly press your seams as you sew. This helps in maintaining the shape and gives a professional look to your kimono.
- Topstitching: Adding topstitching can enhance the aesthetic appeal of your kimono, providing both strength and style.
Adding Final Touches
Once the main assembly is complete, it's time to focus on the final touches that can elevate your kimono:
- Embellishments: Consider adding decorative elements like embroidery or appliqué to personalize your piece.
- Linings: A well-chosen lining can add comfort and sophistication. Choose a fabric that complements your outer fabric.
- Closures: Decide on closures such as hooks, ties, or buttons that suit your design.
In conclusion, assembling your kimono is not just about sewing pieces together; it's about creating a work of art that reflects your personal style. By utilizing the right techniques and adding thoughtful details, you can ensure that your kimono is not only beautiful but also uniquely yours.
Sewing Techniques
When it comes to assembling your kimono, mastering essential is crucial for achieving a professional finish. This section will guide you through various seam types and finishing methods that are particularly effective for kimono construction.
- Understanding Seam Types
- Plain Seam: The most common seam, used to join two fabric pieces together. It's strong and versatile, making it ideal for the main body of the kimono.
- French Seam: This seam encloses raw edges, providing a neat finish. It's perfect for lightweight fabrics that may fray easily.
- Flat-Felled Seam: Known for its durability and clean finish, this seam is often used in areas that experience stress, such as underarms.
- Finishing Methods
- Overlocking: This technique prevents fabric edges from fraying and adds a professional touch to your kimono. An overlocker machine is ideal for this method.
- Bias Binding: Use bias tape to finish edges, especially on necklines and hems, providing a polished look while adding color contrast.
- Hemming: A well-executed hem can enhance the overall appearance of your kimono. Options include hand-stitched hems for a delicate finish or machine hems for speed.
In addition to these techniques, consider the importance of pressing your seams as you sew. This step ensures that your kimono maintains its shape and structure, resulting in a more refined final product. Always test your techniques on scrap fabric before moving on to your kimono fabric to ensure the best results.
By mastering these sewing techniques, you will be well on your way to assembling a beautiful and unique kimono that showcases your personal style.
Adding Final Touches
to your kimono is the key to transforming a simple garment into a stunning piece of art. While the basic structure and fabric choice are essential, it is the embellishments, linings, and closures that truly elevate the overall design and make your kimono unique.
To begin with, consider the embellishments. These can range from intricate embroidery to delicate beading or even appliqué designs. Each embellishment adds a personal touch and can reflect your individual style. For instance, floral embroidery might evoke a sense of nature, while geometric patterns can give a modern twist. When choosing embellishments, think about the overall theme of your kimono and how these details can enhance it.
Next, the lining of your kimono plays a crucial role in both comfort and aesthetics. A well-chosen lining can add warmth and structure, while also providing a delightful surprise when the kimono is worn open. Fabrics like silk or cotton can be used for linings, depending on the desired effect. Additionally, consider using a contrasting color or pattern for the lining to create a striking visual effect.
Finally, the closures of your kimono should not be overlooked. Traditional options include obi sashes or ties, but modern interpretations might incorporate buttons or zippers. The choice of closure can greatly influence the functionality and style of your kimono. Ensure that the closure complements the overall design and is practical for wear.
In conclusion, the final touches of embellishments, linings, and closures are what truly make your kimono stand out. By thoughtfully incorporating these elements, you can create a garment that is not only beautiful but also a reflection of your personal style.
Conclusion: Personalizing Your Kimono
Creating your own kimono pattern is not just a craft; it is a transformative journey that allows for deep personal expression and creativity. This process can be incredibly rewarding, as it enables you to showcase your unique style while embracing the rich cultural heritage of kimono making. Below are some key steps to consider as you embark on this exciting venture:
- Explore Traditional and Modern Styles: Understanding the various styles of kimono, from the classic to contemporary, can help you identify what resonates with your personal aesthetic.
- Choose the Right Fabric: The fabric you select plays a crucial role in the comfort and drape of your kimono. Experiment with different materials like cotton for casual wear or silk for a more formal look.
- Gather Inspiration: Look for inspiration in nature, art, or even your favorite colors. This can spark ideas for patterns and designs that reflect your personality.
- Sketch Your Ideas: Translating your thoughts onto paper is essential. Use tools like pencils and software to create initial sketches that capture your vision.
- Draft the Pattern: Accurate measurements and careful drafting of pattern pieces ensure that your kimono fits perfectly. Pay attention to details such as sleeve length and collar shape.
- Assemble with Care: When sewing, utilize various techniques to ensure a polished finish. Don’t forget the final touches, such as embellishments or linings, which can elevate your design.
Ultimately, the journey of creating your own kimono pattern is about self-discovery and artistic expression. Embrace the process, and don’t hesitate to experiment with your designs. Each kimono you create will be a testament to your creativity and a reflection of your individuality.
Frequently Asked Questions
- What materials do I need to create my own kimono pattern?
To create your own kimono pattern, you'll need basic materials like paper, pencils, a ruler, and a measuring tape. If you’re going digital, software like Adobe Illustrator or free options like Inkscape can be super helpful!
- How do I choose the right fabric for my kimono?
Choosing the right fabric is all about comfort and style! Cotton is great for casual wear, while silk offers a luxurious feel. Think about the occasion and the drape you want before making your choice.
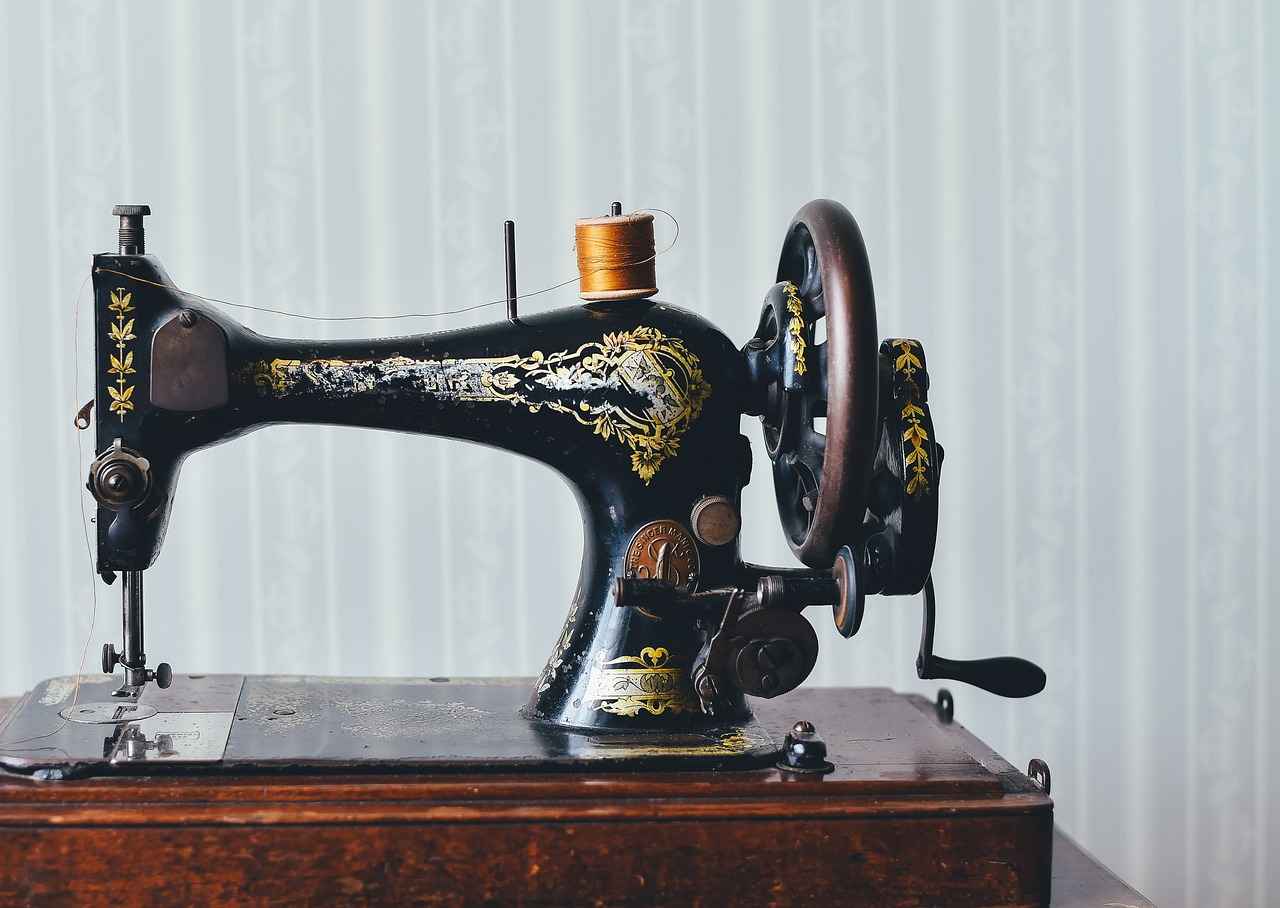
- Can I use a sewing machine to assemble my kimono?
Absolutely! A sewing machine can make the assembly process much faster and neater. Just make sure to familiarize yourself with the different stitch types that work best for your fabric.
- What are some tips for sketching my kimono design?
Start with basic shapes and outlines, then add details as you go. Don't worry about perfection—just let your creativity flow! Using reference images can also spark inspiration.
- How can I personalize my kimono?
Personalization is key! You can add unique embellishments, choose a color palette that speaks to you, or even incorporate patterns from your favorite sources like nature or art.