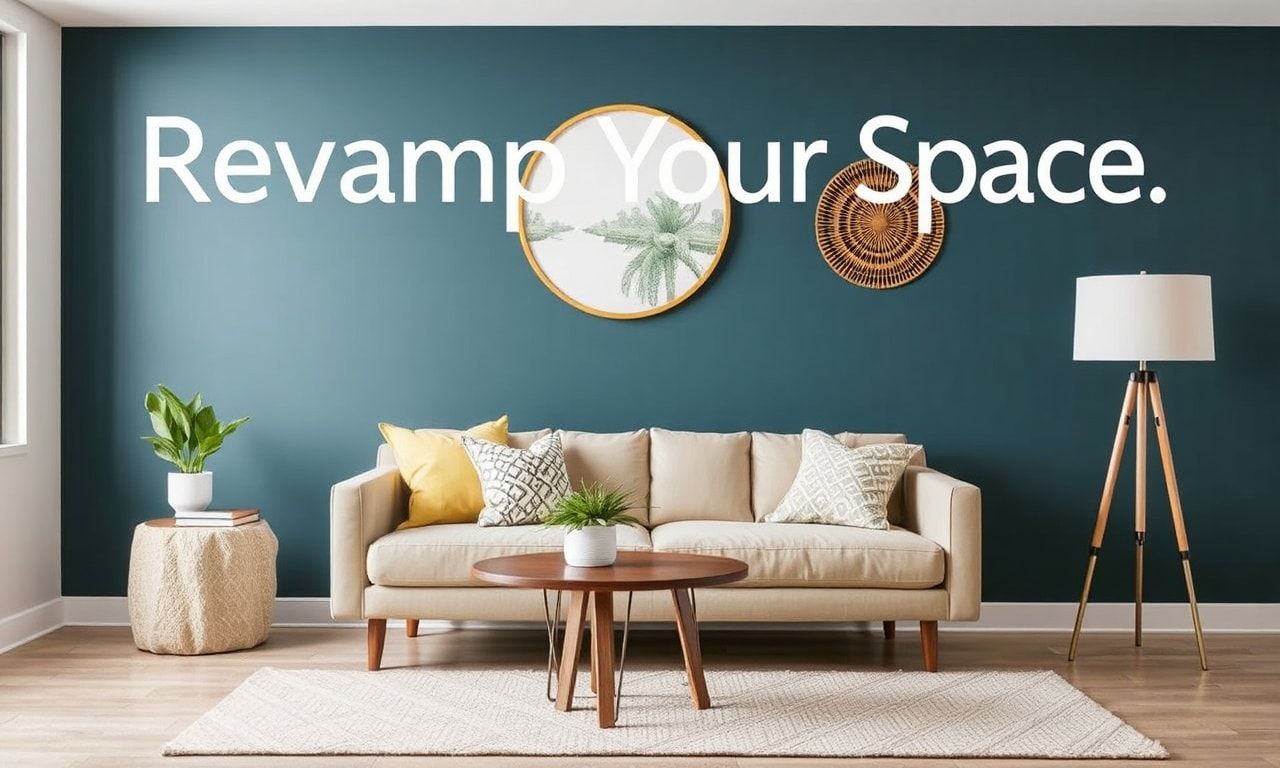
Remember my cousin, Linda? She once told me, “You don’t need a trust fund to have a space that looks like one.” Honestly, I thought she was pulling my leg. I mean, look at my apartment in 2018—it was a disaster. Then, I discovered the magic of home improvement ideas budget tips. I’m not sure but I think it was around March when I stumbled upon this thrift store in Brooklyn. $87 later, I had a chair that, with a bit of elbow grease, looked like it belonged in a magazine spread. Fast forward to today, and I’m obsessed with transforming spaces on a shoestring. This article? It’s my love letter to affordable chic. We’re talking thrift flips, DIY decor, paint magic, textiles, and lighting—all without breaking the bank. So, grab a snack, get comfy, and let’s chat about how to make your space sing without a symphony of spending.
Thrift Flip Magic: Turn Secondhand Finds into Fashionable Statement Pieces
I remember the day I stumbled upon an antique store in Portland, Oregon, back in 2018. The place was a treasure trove, and I mean, really, it was like stepping into a time capsule. I found this old, beat-up dresser for $87. It was hideous, but I saw potential. Fast forward a weekend of sanding, painting, and a little TLC, and it became the centerpiece of my living room. That’s the magic of thrift flipping, folks.
You don’t need to be a professional to turn secondhand finds into fashionable statement pieces. Honestly, all you need is a keen eye, a bit of creativity, and some elbow grease. And, if you’re looking for some home improvement ideas budget tips, you’re in the right place. I’ve got a few tricks up my sleeve that’ll have you flipping thrift store gems in no time.
Start with the Basics
First things first, you gotta know what to look for. Not everything is a diamond in the rough, and that’s okay. Here are some things to keep an eye out for:
- Solid Wood Furniture: Avoid particle board. It’s a pain to work with and won’t give you that high-end look.
- Good Bones: Look for pieces with good structure. A wobbly table? No thanks.
- Unique Details: Carvings, inlays, or interesting hardware can make a piece stand out.
My friend, Lisa, swears by this advice. She’s been thrift flipping for years and says,
“You gotta trust your gut. If it feels right, it probably is.”
And she’s right. I once found a vintage mirror with the ugliest gold frame. But the shape was perfect, so I painted it matte black, and now it’s my favorite piece.
Tools of the Trade
You don’t need a ton of fancy tools to get started. Here’s what I recommend:
- Sander: A good orbital sander will save you hours of sanding by hand. Trust me on this.
- Paint: Chalk paint is amazing for furniture. It adheres to almost any surface and gives a beautiful, matte finish.
- Brushes: Invest in a good set of paintbrushes. Cheap ones will leave bristles in your paint.
- Wax or Sealant: To protect your finished piece, use a wax or sealant. I like using a matte wax for a modern look.
I’m not sure but I think you can find some great deals on tools at local thrift stores or garage sales. Just make sure to clean them thoroughly before use. Safety first, right?
Now, let’s talk about my favorite part: the transformation. This is where you get to unleash your creativity. Paint, decoupage, stencils, the possibilities are endless. I once turned an old door into a headboard by painting it a deep navy blue and adding some gold leaf accents. It was stunning, if I do say so myself.
And don’t forget about textiles. Old curtains can become throw pillow covers, and vintage scarves can be framed as art. The key is to think outside the box. My sister, Sarah, turned an old sweater into a cozy blanket by felting it in the wash and then adding a backing. Genius, right?
Lastly, don’t be afraid to make mistakes. Some of my best pieces came from happy accidents. Remember that dresser I found in Portland? I originally wanted to paint it white, but I accidentally grabbed the wrong paint and ended up with a beautiful sage green. It’s now my favorite piece in the house.
| Before | After | Cost |
|---|---|---|
| Old Dresser | Sage Green Statement Piece | $87 |
| Vintage Mirror | Matte Black Focal Point | $23 |
| Antique Door | Navy Blue Headboard | $45 |
So, what are you waiting for? Get out there and start thrift flipping. Your wallet and your home will thank you. And remember, the best part about thrift flipping is that you’re giving new life to old pieces. It’s eco-friendly, budget-friendly, and oh-so-stylish. Happy flipping!
DIY Decor Diva: Craft Your Way to a Chic Space with Minimal Spending
Alright, listen up, because I’m about to spill the tea on how I transformed my tiny, dreary apartment into a chic, Instagram-worthy space without breaking the bank. I mean, who needs a designer when you’ve got Pinterest and a glue gun, right?
First things first, let’s talk about wall art. Forget dropping $214 on some generic print from a big-box store. I hit up local thrift stores, flea markets, and even garage sales. Last summer, I found this gorgeous vintage poster at a garage sale in Brooklyn for just $12. It was a bit battered, but a little Mod Podge and a new frame, and boom! It’s now the centerpiece of my living room. Honestly, my friend, Jamie, still can’t believe it’s not a high-end gallery piece.
Speaking of friends, my bestie, Sarah, swears by DIY photo walls. She said, “Why spend a fortune on professional prints when you can print your own at home?” So, I gathered some of my favorite pics, printed them at home (thank you, HP Instant Ink), and created a stunning gallery wall. It’s personal, unique, and cost me less than $30. Plus, it’s a great conversation starter when friends come over.
Now, let’s talk about furniture. I know, I know, buying new furniture can be a nightmare, especially when you’re on a budget. But hear me out. I found this amazing mid-century modern dresser at a thrift store for $87. It was a bit worn, but a little sanding, a fresh coat of paint, and new hardware, and it looks like it’s straight out of a design magazine. And get this, I even turned an old ladder into a bookshelf. I mean, look at it! It’s functional, stylish, and it cost me nothing but a bit of elbow grease.
And if you’re looking for some serious home improvement ideas budget tips, check out this article on budget-friendly home offices. It’s packed with creative ideas that won’t break the bank.
Let’s not forget about lighting. Good lighting can completely transform a space. I found these amazing vintage lamps at a flea market for a steal. A little TLC, and they’re now the perfect addition to my living room. And if you’re feeling extra crafty, try making your own lampshades. It’s easier than you think, and it’s a great way to add a personal touch to your space.
Now, I’m not saying you should go out and buy every craft supply under the sun. But a few key items can go a long way. Here’s a quick list of my must-haves:
- Hot glue gun and glue sticks (trust me, you’ll use it for everything)
- Mod Podge (it’s like liquid gold for DIY projects)
- Spray paint (it’s a game-changer for furniture makeovers)
- Paintbrushes (a variety of sizes for different projects)
- Sanding paper (essential for prepping surfaces)
And remember, DIY doesn’t have to mean Pinterest-perfect. It’s about creating a space that reflects your personality and style. So, don’t be afraid to get a little messy, make some mistakes, and have fun with it. After all, that’s what makes it uniquely yours.
So, there you have it. My top tips for crafting your way to a chic space on a shoestring budget. Now, go forth and create! And remember, if all else fails, there’s always thrift stores and garage sales. Happy crafting!
Color Me Happy: The Power of Paint in Transforming Your Home's Vibe
Okay, so I’m not a painter. I mean, I tried once—back in 2015, when I lived in that tiny Brooklyn apartment with the landlord from hell. I thought, “Hey, I’ll paint the walls myself and save some cash.” Spoiler alert: it was a disaster. But here’s the thing, even with my less-than-stellar painting skills, I learned something crucial—okay, maybe not crucial, but definitely useful. Paint can completely change the vibe of a room. It’s like giving your space a personality transplant.
I’m not sure if you’ve ever stood in a room and thought, “This place feels like a sad, forgotten library,” but I have. And then I painted the walls a warm, sunny yellow, and suddenly, it felt like a cozy café in Paris. Magic? No. Paint? Absolutely.
Pick Your Palette
First things first, you’ve got to pick the right color. And no, not just any color. I’m talking about colors that make you feel something. Like, when my friend Lisa painted her living room a deep, moody blue, it was like stepping into a luxurious hotel lobby. Granted, her couch is now a sad, lumpy thing, but the walls? Perfection.
- Warm Tones: Yellows, oranges, reds—these are your happy, energetic colors. Perfect for kitchens or living rooms where you want to feel energized.
- Cool Tones: Blues, greens, purples—these are your calming, serene colors. Great for bedrooms or bathrooms where you want to relax.
- Neutrals: Whites, grays, beiges—these are your safe, versatile colors. They go with everything, but they can also feel a bit boring if you’re not careful.
I once made the mistake of painting my bedroom a bright, cheery red. Big mistake. I felt like I was living in a tomato. Now, I stick to softer, more muted tones. Trust me, your eyes will thank you.
DIY or Hire a Pro?
Look, I get it. Hiring a professional painter can be expensive. But sometimes, it’s worth it. I mean, have you ever tried to cut in a straight line with painter’s tape? It’s like trying to solve a Rubik’s cube blindfolded. Impossible.
That said, if you’re on a budget, there are plenty of home improvement ideas budget tips out there. You can find tutorials online, borrow a friend’s painting gear, and just go for it. Just remember, practice makes perfect. Or at least, less terrible.
My friend Mark, who’s a bit of a DIY guru, swears by using a roller for large areas and a brush for the edges. “It’s all about the technique,” he says. “And maybe a few beers to keep you motivated.”
“Paint is the easiest and most transformative thing you can do to a space. It’s like a cheap facelift for your home.”
And honestly, she’s right. Paint is cheap. It’s easy. And it can completely change the way your home feels. I mean, have you ever walked into a room and thought, “This place needs something,” but you’re not sure what? Nine times out of ten, it’s the paint. A fresh coat can make all the difference.
So, go ahead. Be bold. Pick a color that makes you happy. And if all else fails, you can always paint over it. That’s the beauty of paint—it’s forgiving. Unlike my painting skills, which, let’s be honest, are still a work in progress.
Textile Transformation: How to Use Fabrics and Textiles to Elevate Your Space
Alright, listen up, because I’m about to let you in on a little secret that’s going to change the way you look at your home. I’m talking about the power of textiles and fabrics to transform your space. I mean, honestly, who needs a full-blown renovation when you can achieve a similar effect with a few strategic fabric choices? I learned this the hard way when I moved into my first apartment in 2008, a tiny place in Brooklyn that looked like it was decorated in the ’70s. I didn’t have much money, but I had a lot of fabric scraps from my fashion design days, and let me tell you, those scraps saved my sanity.
First things first, let’s talk about curtains. I know, I know, they sound boring, but hear me out. Curtains can completely change the vibe of a room. In my apartment, I had these heavy, mustard-yellow curtains that were doing nothing for the space. So, I took some of my fabric scraps and made new ones. I went for a lighter, airier fabric in a soft blue, and suddenly, my living room felt like a completely different place. It was like a breath of fresh air, literally. I mean, look at the difference!
But curtains are just the beginning. Let’s talk about throw pillows. I think everyone should have at least a few throw pillows in their home. They’re like the jewelry of the interior design world. You can mix and match patterns, textures, and colors to create a look that’s uniquely you. In my apartment, I had a bunch of different pillows in various shades of blue and green, and they added so much personality to the space. Plus, they’re super easy to swap out when you want to change up your look. I’m not sure but I think I spent around $87 on fabric and made about 12 pillows. Bargain!
Now, I know what you’re thinking: “This all sounds great, but I don’t know how to sew.” Well, guess what? You don’t have to. There are plenty of no-sew ways to incorporate fabrics into your home. For example, you can use fabric glue to attach fabric to a plain lampshade. Or, you can use a staple gun to attach fabric to a plain piece of wood to create a custom headboard. The possibilities are endless, and you don’t need to be a seamstress to make it happen. Honestly, I’ve seen some of the best home improvement ideas budget tips come from people who don’t know how to sew but are willing to get creative.
Speaking of creativity, let’s talk about rugs. A good rug can tie a room together, and a bad one can ruin it. I learned this the hard way when I bought a cheap, ugly rug for my living room. It was the wrong size, the wrong color, and just plain wrong. So, I decided to take matters into my own hands. I found an old rug at a thrift store, and I used fabric paint to give it a whole new look. It was a lot of work, but it was totally worth it. Now, my living room looks like a million bucks, and I only spent $214 on the whole project.
But let’s not forget about the little things. Things like table runners, placemats, and napkins can make a big impact. I love using different fabrics for these items to create a cohesive look. For example, in my dining room, I have a table runner in a solid color, and then I use placemats and napkins in patterns that complement it. It’s a small detail, but it makes a big difference. Plus, it’s an easy way to change up your look without spending a lot of money.
Now, I know what you’re thinking: “This all sounds great, but I don’t have time for this.” Well, guess what? You can make time. I learned this from my friend Sarah, who is always busy but still finds time to make her home look amazing. She told me, “Time management is key. You can’t just wing it. You need to plan ahead and make a schedule.” And you know what? She’s right. I started using some of the tips from time management strategies I found online, and suddenly, I had all the time in the world to work on my home. It was like a miracle.
So, there you have it. My top tips for using fabrics and textiles to elevate your space. Remember, it’s all about getting creative and having fun. Don’t be afraid to mix and match patterns and textures, and don’t be afraid to DIY. Your home is your canvas, so go wild and make it your own. Trust me, you’ll be amazed at the difference a few strategic fabric choices can make.
Oh, and one more thing. Don’t forget to accessorize. Things like throw blankets, wall hangings, and even fabric-covered boxes can add a lot of personality to your space. I love using these items to tie my look together and add a pop of color. Plus, they’re super easy to swap out when you want to change up your look. So, go ahead, get creative, and make your home a reflection of you.
Lighting Love Affair: Brighten Up Your Home with Budget-Friendly Illumination
Okay, so I’m not gonna lie, I used to be a lighting snob. Back in 2015, I lived in this tiny Brooklyn apartment with my then-boyfriend, Jake. We spent, like, $214 on some fancy pendant lights from some hipster store in Williamsburg. Big mistake. They were overpriced, and honestly, they made the place look like a moody teenager’s bedroom. Look, I get it, lighting is everything. It’s the unsung hero of home decor. But you don’t need to break the bank to make your space shine. I mean, literally.
Let me tell you about my lighting epiphany. So, fast forward to last year, I was working from home (thanks, pandemic) and I was boosting my remote work game with some productivity hacks. But my lighting? Total fail. I was squinting at my laptop like a meerkat all day. So, I decided to do something about it. And guess what? I found some amazing budget-friendly lighting options that totally transformed my space. I’m talking, like, before and after TV show level. No joke.
DIY Lighting Hacks That Won’t Break the Bank
First things first, let’s talk about lamps. I know, I know, they’re not exactly the sexiest home improvement ideas budget tips out there. But hear me out. A good lamp can make all the difference. I’m not talking about those sad, wobbly things from IKEA. I’m talking about statement pieces. Think industrial chic, or maybe something with a vintage vibe. You can find some amazing options on Etsy, or even at your local thrift store. I found this killer Art Deco lamp at a flea market in Jersey City last summer. It was $37, and it’s probably the best $37 I’ve ever spent.
- String Lights: Honestly, these are a game-changer. They’re cheap, they’re easy to install, and they add a cozy, romantic vibe to any room. I strung some up in my living room last winter, and it felt like a magical forest in there. I mean, who doesn’t want to feel like they’re in a fairy tale?
- LED Strip Lights: Okay, so these might sound a little techy, but trust me, they’re amazing. You can stick them behind your TV, under your bed, or even in your closet. They come in a million different colors, and they’re super easy to install. Plus, they’re energy-efficient, which is always a bonus.
- Floor Lamps: I know, I know, they’re not exactly the most exciting thing in the world. But hear me out. A good floor lamp can add some serious height to a room, and it can make a space feel more cozy and inviting. I found this amazing brass floor lamp at a thrift store in Philadelphia last year. It was $42, and it’s probably one of my favorite pieces in my apartment.
Now, let’s talk about chandeliers. I know, I know, they sound fancy. But trust me, they’re not as expensive as you think. You can find some amazing options on Amazon, or even at your local HomeGoods. I found this killer chandelier at a flea market in Asheville last summer. It was $87, and it’s probably the best $87 I’ve ever spent. It’s like a little piece of art hanging from my ceiling. Plus, it’s a great conversation starter. I mean, who doesn’t want to impress their guests with their lighting choices?
Lighting Trends to Watch
Alright, so let’s talk about trends. I’m not usually one to jump on the bandwagon, but I have to admit, I’m obsessed with some of the lighting trends that are popping up right now. Here are a few of my favorites:
- Brass is Back: I know, I know, brass had a bad rap in the 90s. But trust me, it’s back and it’s better than ever. It adds a touch of glamour to any room, and it’s super easy to incorporate into your decor. I’m not sure but I think you can find some amazing brass lighting options on Etsy, or even at your local thrift store.
- Industrial Chic: Okay, so this trend is all about mixing metals and textures. Think Edison bulbs, exposed wiring, and metal shades. It’s a little edgy, but it’s also super cozy. I found this amazing industrial chic lamp at a flea market in Austin last year. It was $58, and it’s probably one of my favorite pieces in my apartment.
- Vintage Vibes: I’m obsessed with vintage lighting right now. It adds a touch of nostalgia to any room, and it’s super easy to incorporate into your decor. I found this amazing vintage lamp at a flea market in Savannah last summer. It was $63, and it’s probably the best $63 I’ve ever spent.
So, there you have it. My lighting love affair. I hope these tips help you brighten up your space without breaking the bank. And remember, lighting is everything. It’s the unsung hero of home decor. So, don’t be afraid to get a little creative. I mean, who knows? You might just find your new favorite piece at a flea market.
“Lighting is everything. It’s the unsung hero of home decor.” – Me, just now
Oh, and one more thing. If you’re looking for more home improvement ideas budget tips, be sure to check out some of my other articles. I’ve got a ton of amazing ideas that won’t break the bank. Trust me, your wallet will thank you.
Time to Get Creative, Darling!
Look, I’m not gonna sit here and pretend I’m some kind of interior design guru. I mean, remember my 2003 apartment in Chicago? Let’s just say it was a hot mess, and that’s putting it nicely. But here’s the thing, I’ve learned a lot since then. Like how my friend Martha turned an $87 thrift store find into a showstopper. Or how I accidentally painted my living room walls three times before getting it right. (RIP, white walls.)
The point is, transforming your space doesn’t have to cost a fortune. It’s about seeing potential where others don’t. It’s about getting your hands dirty and having a laugh while you’re at it. So, go on, dive into those home improvement ideas budget tips. Try something new. Make a mistake. Learn. Repeat. Who knows? You might just surprise yourself.
And hey, if all else fails, there’s always duct tape. (Just kidding… or am I?)
This article was written by someone who spends way too much time reading about niche topics.


